

Så lyckas du med torkade växter: komplett guide 2026
TL;DR:
- Torkade växter behåller form och färg i flera år utan mycket underhåll.
- Rätt torkmetod och noggrann process är avgörande för ett lyckat resultat.
- Dokumentation och tålamod förbättrar kvaliteten vid torkning för professionellt bruk.
Färska blommor är vackra men de vissnar inom dagar och kräver konstant tillsyn. Det är frustrerande när en bukett du spenderat pengar på ser uttjänt ut redan efter en vecka. Det finns ett bättre alternativ: torkade växter. De håller sin form och färg i åratal, kräver nästan noll underhåll och passar lika bra i hemmet som i en butiksmiljö eller på ett event. Många tror att torkningsprocessen är komplicerad, men det stämmer inte. Med rätt förberedelser och ett tydligt tillvägagångssätt kan du skapa professionella resultat oavsett om du är nybörjare eller arbetar med inredning på heltid. Den här guiden tar dig igenom hela processen, från material och växtval till torkmetod, kvalitetskontroll och lagring.
Innehållsförteckning
- Vad krävs för att torka växter: material, verktyg och val
- Steg-för-steg: så torkar du växter hemma och proffsigare
- Expertråd för bästa resultat: dosering, fukt och mögel
- Så ser du att din torkningsprocess lyckats
- Vår syn: Därför är processen viktigare än växtvalet
- Dekorera smart: vägval till färdiga torkade växter och inspiration
- Vanliga frågor om att torka växter
Viktiga Insikter
| Punkt | Detaljer |
|---|---|
| Välj rätt torkningsmetod | Anpassa metod efter växttyp och mängd för optimalt resultat. |
| Undvik fällor som mögel | Torka i små batcher med ventilation och håll fuktiga sorter åtskilda. |
| Processen går att standardisera | Dokumentera dosering och tid för att förenkla upprepning i butik och event. |
| Färdiga lösningar sparar tid | Du kan alltid köpa färdigt torkade växter för proffsigt och hållbart resultat. |
Vad krävs för att torka växter: material, verktyg och val
Nu när du har fått överblick över varför torkade växter är smarta, är nästa steg att samla rätt material och förbereda dig. Valet av växt och verktyg påverkar resultatet mer än de flesta tror, och torkade växter lämpar sig bättre för inredning än färska just för att de inte kräver vatten eller löpande omsorg.
Alla växter är inte lika enkla att torka. Sorter med låg fukthalt ger bäst resultat och behåller sin form. Här är ett urval av växter som fungerar utmärkt:
- Eucalyptus: Tål torkning bra, behåller bladform och ger en mild doft
- Hortensia: Populär för sin stora blomkorg, torkar vackert om man väntar tills blomman börjar åldras
- Lavendel: Snabbtorkad, håller färg och doft länge
- Pampasgräs och dekorativa gräs: Extremt tacksamma att torka, ingen fukthalt att oron sig för
- Eterneller (Helichrysum): Naturligt papperaktiga redan från start, torkar utan att förlora form
- Vete och rågsorter: Stabila, billiga och ser fantastiska ut i arrangemang
För pressning lämpar sig flata, tunna blommor bäst: fibbla, viol och kransblomma är klassiska val.
Verktyg och redskap du behöver
Du behöver inte dyra specialredskap. Det räcker med:
- Vass sax eller blomsterkniv för rena snitt
- Naturfiber snöre för att bunta blommor
- Pappersark och kartong för press och absorptionskraft
- Växtpress eller skruvpress om du vill pressa platta former
- Ugn eller dehydrator om du väljer snabba metoder
- God ventilation i arbetsrummet för att fukten ska kunna ledas bort
Som växter för hemmet visar är det processen och inte enbart sortval som avgör slutresultatet. Olika växttyper och redskap ger olika resultat och kräver anpassning av torkningsmetod, vilket gör förberedelserna till ett steg du inte bör hoppa över.
| Växttyp | Fuktnivå | Rekommenderad metod |
|---|---|---|
| Pampasgräs | Låg | Lufttorkning |
| Hortensia | Medel | Lufttorkning eller vatten-metod |
| Lavendel | Låg | Lufttorkning |
| Eucalyptus | Medel | Lufttorkning |
| Suckulenter | Hög | Dehydrator eller ugn |
| Pressblommor | Varierande | Växtpress |
Proffstips: Skörda blommor tidigt på morgonen när de innehåller minst fukt. Undvik att plocka efter regn, det fördubblar risken för mögel under torkning.
Steg-för-steg: så torkar du växter hemma och proffsigare
När du valt växter och har rätt verktyg är det dags att faktiskt starta torkningen. Det finns flera metoder och ingen av dem är universellt bäst. Valet beror på vilken växttyp du arbetar med, hur snabbt du behöver resultatet och vilken utrustning du har tillgång till.
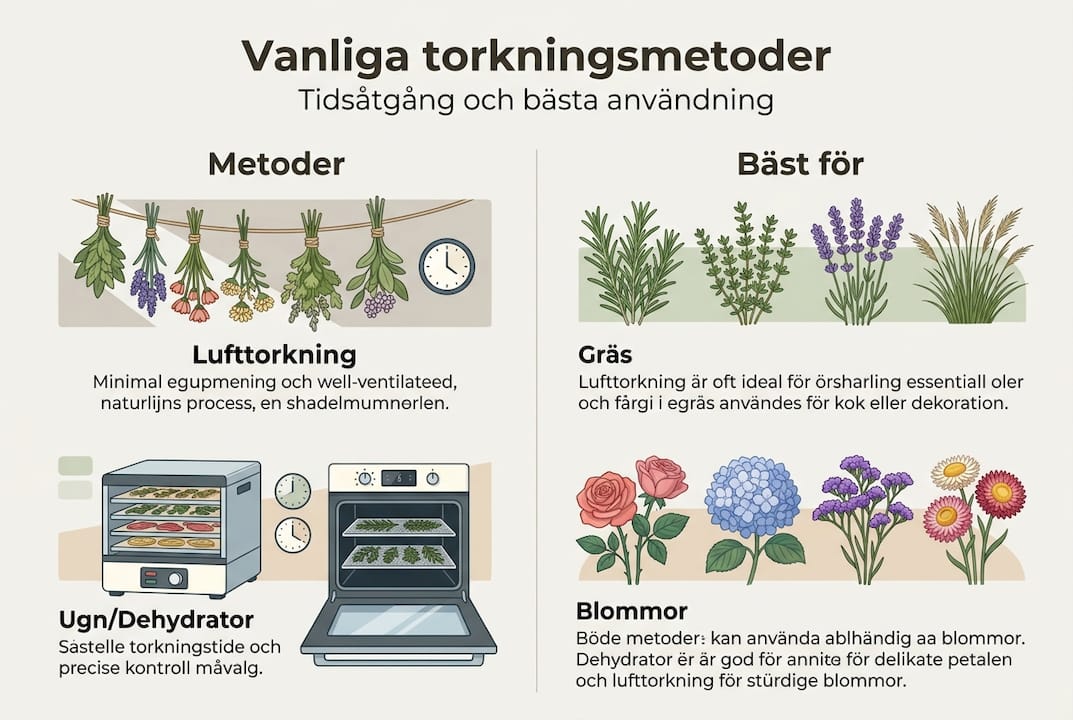
Metod 1: Lufttorkning
Detta är den vanligaste och enklaste metoden. Den passar de flesta växter och kräver ingen utrustning utöver snöre och en bra plats.
- Ta bort de nedersta bladen från stjälken
- Bunta ihop 5 till 8 stjälkar med snöre, inte för tätt
- Häng buketten upp och ned på en skuggig, välventilerad plats
- Låt hänga i 2 till 4 veckor beroende på växttyp
- Kontrollera regelbundet att det inte bildas fukt eller mögel
Skuggig placering är viktigt. Direkt solljus bleker färgen snabbt.
Metod 2: Ugn eller dehydrator
Ugn och dehydrator påskyndar processen avsevärt. Metoder för torkning som luft, ugn och dehydrator ger olika resultat beroende på temperatur och tid. Håll ugnen på 40 till 60 grader Celsius. Lägg blommorna på ett galler utan att de överlappar. Regniga dagar eller fuktiga miljöer kräver extra tid.
Metod 3: Mikrovågsugn
Mikrovågen passar för små volymer och ger snabbt resultat. Kör i 30 till 60 sekunders intervaller och låt växten vila emellan. Fortsätt tills känslan är papperaktig. Använd aldrig metalldelar i närheten.
Metod 4: Växtpress och herbarium
Pressade växter kräver flera veckors tryck och pappersbyten för bästa resultat. Lägg blomman mellan pappersark, lägg tyngd eller skruva fast pressen och byt papper var 48:e timme de första veckorna.
En välpressad blomma kan hålla sin färg och form i decennier om den förvaras rätt, vilket gör metoden populär för konst och botaniska samlingar.
För dig som arbetar med hållbara eventmiljöer är lufttorkning och dehydrator de mest skalbara metoderna. Vill du lära dig mer om att göra egna buketter steg för steg finns det fler tips att hämta i vår bukettsguide.
| Metod | Tid | Kontrollbehov | Bäst för |
|---|---|---|---|
| Lufttorkning | 2 till 4 veckor | Lågt | De flesta sorter |
| Ugn | 2 till 8 timmar | Högt | Tjockare stjälkar |
| Dehydrator | 4 till 12 timmar | Medel | Örter, tunna blad |
| Mikrovåg | 5 till 20 minuter | Mycket högt | Små volymer |
| Växtpress | 4 till 8 veckor | Medel | Platta dekorativa blommor |
Proffstips: Märk varje bukett med art och startdatum. Det låter enkelt men sparar dig mycket gissningsarbete när du hanterar flera sorter samtidigt.
Expertråd för bästa resultat: dosering, fukt och mögel
När du kan själva torkningsmomenten är det viktigt att förstå hur små misstag påverkar slutresultatet. Fukt är den vanligaste orsaken till misslyckade torkningar och den är lättast att kontrollera om du vet vad du ska hålla koll på.
Undvik blandade batcher med hög fuktrisk
Ett vanligt misstag är att blanda mycket saftiga blommor, som rosor eller suckulenter, med torra sorter som lavendel i samma omgång. Hög fukt i blandning kan leda till mögel och kräver processkontroll. Fukten från de saftiga sorterna kan smitta av sig och förstöra de torra.
Här är de viktigaste punkterna att tänka på:
- Torka saftiga och torra sorter alltid separat
- Håll rummet välventilerat, helst med ett öppet fönster eller fläkt
- Byt papper minst var 48:e timme vid pressning de första två veckorna
- Kontrollera buntar visuellt var tredje dag vid lufttorkning
- Kassera omedelbart om du ser gråa eller vita fläckar, det är mögel
- Undvik källare eller badrum som torkplats, fuktigt mikroklimat ökar risken
Hur du förhindrar färgförlust
Färgförlust händer oftast av tre skäl: för stark värme, för mycket direkt solljus, eller att blomman skördades för sent. Plocka blommor i halvöppet läge för bästa färgresultat. Skördas de för sent tappar de snabbt nyans under torkning.
Proffstips: För dig som arbetar med butiksdekoration eller återkommande eventlösningar, skapa ett enkelt dokument där du noterar art, skördedatum, torkmetod och torktid. Det gör det möjligt att upprepa processen med samma kvalitet varje gång utan att behöva gissa.
God skötsel av torkade blommor börjar redan under torkningsfasen. Följer du rätt rutiner nu slipper du problem senare. Vår skötselguide för torkade växter ger dig mer information om hur du tar hand om växterna efter torkning.
Fakta: Torkade växter som förvaras korrekt kan bevara sin dekorativa kvalitet i upp till tre år, något som gör dem till ett kostnadseffektivt alternativ jämfört med färska blommor som håller i snitt en till två veckor.
Så ser du att din torkningsprocess lyckats
När växterna varit på tork är det dags att avgöra när de verkligen är redo att användas. Det är ett steg många hoppar över, men det är avgörande för slutresultatet.
Tecken på att torkningen lyckats
- Stjälken är stel och bryter om du böjer den hårt, inte mjuk eller böjlig
- Bladen och kronbladen känns pappersaktiga, precis som torrt papper
- Färgen är jämn och liknar den ursprungliga nyansen, kanske lite mörkare men inte grå eller brun
- Det finns ingen lukt av mögel eller fukt, bara en svag naturlig doft
Blomman är klar när bladen fått papprig känsla och färgen är bevarad, och det är det enklaste sättet att bedöma om torkningen är fullständig.
Tecken på att något gick fel
- Stjälkarna är mjuka eller böjda trots lång torktid
- Gråa, bruna eller vita fläckar på blad eller kronblad
- En unken eller sur doft
- Kronblad som lossnar eller faller av vid lätt beröring
Om du märker dessa tecken är det bättre att börja om. Mögel sprider sig och kan påverka andra arrangemang i närheten.
Lagring och vidare användning
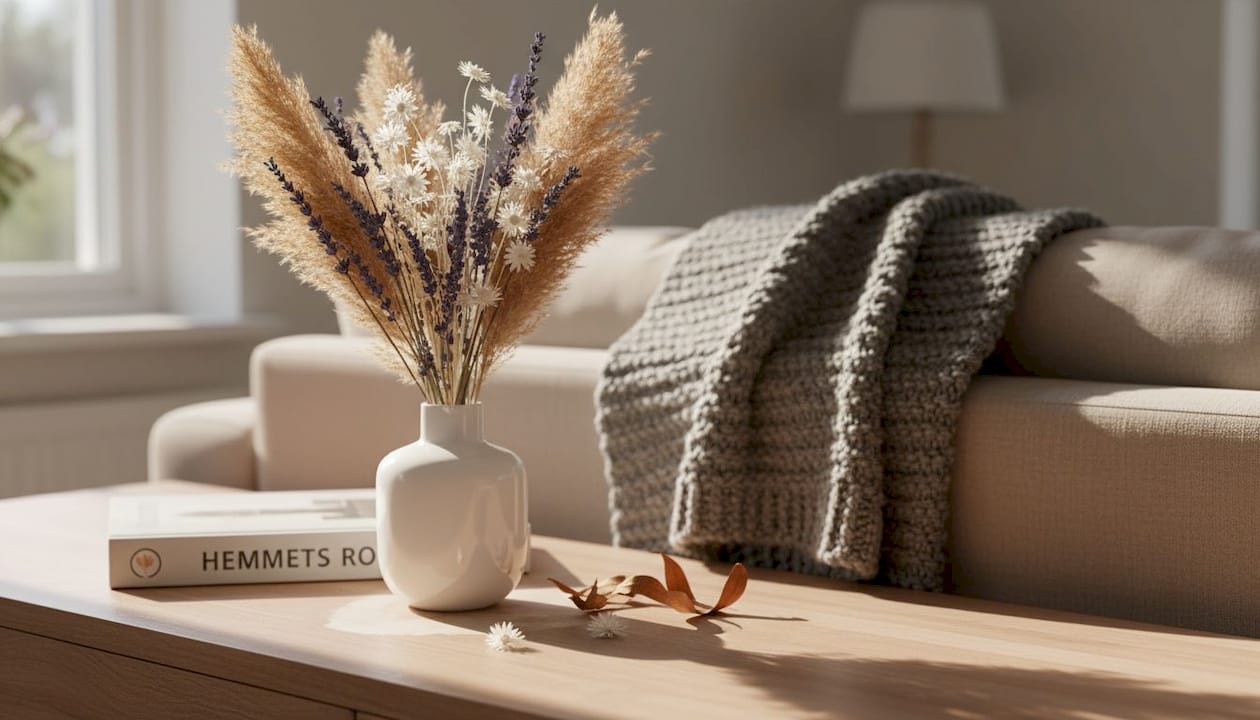
När växterna är klara, förvara dem stående i en vas utan vatten, eller hängande om de inte ska användas direkt. Undvik direkt solsken och hög luftfuktighet. En kardong eller en lufttät låda fungerar bra för långtidslagring.
Proffstips: Spraya färdiga torkade arrangemang med en tunn omgång hårspray. Det ger ett lätt skyddsskikt som minskar damm och håller formen längre.
För trendiga tips på torkade blommor i inredning finns det massor av inspiration att hämta. Vill du göra smarta dekorationsval med torkade blommor ger den guiden konkreta idéer för olika rum och stilar.
Vår syn: Därför är processen viktigare än växtvalet
Det finns ett vanligt missförstånd bland både nybörjare och erfarna inredare: att rätt växtsort automatiskt garanterar ett bra resultat. Vi ser det annorlunda. Det är processen, inte blomman, som avgör kvaliteten.
Många lägger för mycket tid på att hitta den perfekta arten och för lite tid på att faktiskt följa torkningsprocessen noga. En lavendel som hängts upp med för tät buntning och dålig ventilation ger ett sämre resultat än en enklare sort som hanterats rätt från start. Det är det vi ser om och om igen.
Snabbhet är en annan vanlig fälla. Det är frestande att vilja korta ner torktiden, men torkade växter tjänar på tålamod. Skyndar man förbi ventileringsfasen eller missar pappersbyten vid pressning riskerar man mögel och färgförlust. Det är detaljer som verkar små men som gör stor skillnad.
För butiker och eventbolag gäller detta ännu mer. Återupprepningsbarhet är avgörande när du ska leverera konsekvent kvalitet. Dokumentera din process, notera arter och tider, och bygg en rutin. Sortval kan varieras fritt, men rutinen ska vara densamma.
Vi rekommenderar att du också tänker på miljöpåverkan av torkade blommor när du väljer källor och metoder. Hållbarhet handlar inte bara om hur länge blomman håller utan också om hur den odlats och transporterats.
Dekorera smart: vägval till färdiga torkade växter och inspiration
Efter att ha lärt dig grunderna kan färdiga lösningar vara ett effektivt nästa steg. Att torka växter själv är givande, men det kräver tid, planering och ett par misslyckade försök innan resultatet är riktigt bra.

Färdiga torkade arrangemang från Torrdecor sparar tid och eliminerar risken för mögel eller misslyckad torkning. Varje produkt har genomgått en kontrollerad torkprocess och levereras redo att placeras i hemmet, butiken eller på eventet. Vill du ha något att utgå från direkt, är ett Pampasgräs färdigt arrangemang ett utmärkt startval för modern inredning. Hos oss hittar du också ett brett sortiment av torkade buketter i olika storlekar och färgskalor. Utforska hela utbudet och hämta inspiration på Torrdecor, där vi samlar råd, trender och produkter för dig som vill dekorera hållbart.
Vanliga frågor om att torka växter
Vilka växter är lättast att torka för nybörjare?
Gräs, lavendel, vete och eterneller är särskilt nybörjarvänliga då de torkar snabbt och håller färg och form utan att kräva speciell utrustning.
Hur undviker jag mögel när jag torkar växter?
Torka tunna buketter med god ventilation och undvik att blanda saftiga växter med torra sorter i samma omgång, eftersom hög fukt i blandning ökar risken för mögel kraftigt.
Hur länge håller torkade växter?
De flesta torkade växter håller sig dekorativa i 1 till 3 år om de skyddas mot fukt, damm och direkt solsken.
Kan man torka blommor i mikrovågsugn?
Ja, mikrovåg fungerar för små volymer men riskerar ojämn torkning om man inte kör i intervaller och låter blomman vila emellan.
När vet man att växten är färdigtorkad?
Stjälken ska kännas stel och bladen pappersaktiga utan mjukhet eller missfärgning, precis som papprig känsla och bevarad färg beskriver det optimala läget.